Table of Content
Print beautiful borderless designs on print-to-the-edge round labels. If you need to print a lot of labels or you need a professional look, try Avery WePrint, the custom printing service from the experts at Avery. Check out Printing Your Own Labels vs. Professional Printing to help you make the best decision for your project. Single Label and choose the row and column where the label prints on the label sheet. Our guide on how to print your own labels at home is useful in determining the perfect type of label for your specific needs. It is important to read through the specifications of labels before purchasing them.
Handling production yourself saves money and makes the process more flexible, because you can test out new designs whenever you want. You can find adhesive labels in any stationery store andonline. Use the appropriate label templates available in Microsoft Word and print! The labels come in all sizes and shapes or you can get the full-page sizes and cut out your own unique designs. When trying to print precisely on label sheets, it is usual for sheets to slide slightly throughout the printing process, and this misalignment is easier to see. However, you may make any minor misalignments less obvious by employing safe, trim, and bleed regions in your design.
Step 3. Print your Label.
Also store them in a cool, dry location, as humidity can cause label sheets to curl. It contains the template number and printer compatibility. However, with full-sheet labels, make sure that your design stays away from the non-printable edges of the sheet.
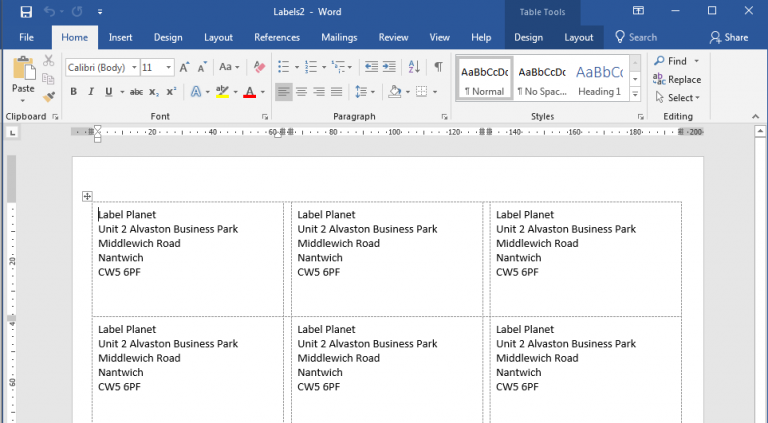
If you do not know the brand of your label or the kind isn’t provided, you may make labels using one of Word’s many templates. The “paper type” or “media type” choice affects how quickly the sheet passes through your printer. With Print-to-the-Edge labels, be sure you are using the proper template.
Stickers vs. Labels – What is the Difference?
Simply use the HP Sprocket smartphone app to handle the entire process. In addition to conventional printers and DIY sticker solutions, consider using a device from the HP Sprocket line of mobile and home photo and sticker printers. There are several different models to pick from, but the two portable versions support sticker printing. If you just want a good color printer that prints stickers, check out the other HP printers available today. Laminating sheets are a little tricky to use, but they’re a great way to make non-vinyl stickers more water-resistant. Get the right size for your preferred paper format, and check the finish if you need a specific surface texture such as matte, or gloss, etc.
Design a custom address return label using this addressing labels template in Word. Design your labels in Microsoft Word, print and cut them out. You can easily stick them to the storage container with some tape for easy removal. To create your own hang tags, punch a hole with a hole punch and thread some cord or ribbon through the hole. Hang tags are great for baskets as you can thread the ribbon or cord through the basket weave or handle. Look for printing beyond the page’s boundaries to ensure that your labels are properly aligned.
Step 2: Choose your template
Place roughly 25 sheets of standard paper in the paper tray below them, but not to the tray’s full capacity. Print and cut out custom shapes with full-page sticker label sheets. Quickly handwrite labels on the spot with file folder labels on 4″ x 6″ sheets.

Letter-size 8-1/2′′ x 11′′ paper is the most popular size. If you are printing on different sheet sizes, such as 4′′ x 6′′, ensure sure the paper size is set to 4′′ x 6′′. The “paper type” or “media type” setting changes the speed at which the sheet is fed through your printer. Change this setting to the “Labels” option to slow down the speed and reduce the risk of misalignment. If your printer does not have an option for “Labels,” you can select one of the options for “Cardstock,” “Heavyweight” or “Premium” instead.
Print your own labels on adhesive label paper.
Common materials for this small DIY project are affordable and readily available online and in supermarkets. Acquiring the skill and knowledge of label printing would be a wise investment. Saving on costs is one of the biggest benefits of printing your own labels by being resourceful.
The first step in understanding “How to print labels at home” ensures that you get the appropriate labels. Buying labels that are not compatible with your printer is one of the most prevalent blunders. If you still need a little help, you can contact our consumer care center for assistance or browse our helpful knowledge base for more answers.
The labels themselves typically cost between $20 and $40 for packs of 1,500. The question of “how to print custom stickers” clearly has many answers which we’ve done our best to sort through. Thanks to the variety of products you can use to print your stickers, just about anyone can become a custom sticker maker. All you need is Microsoft Word and an HP InkJet printer for stickers, and you’re ready to go. Scrutinize the visual quality of the sticker before you produce additional sheets.

You should also make sure that your text will be legible when printed at the actual size. Your font may seem readable when the entire label is filling your screen but it can look very different once printed. Try to use 7pt font or larger depending on the size of your label. Design & Print Online will also display a warning if your font size seems like it will be too small to read. Design and print borderless templates with Avery 2″ square labels.
Inkjet printers use water-based inks, while laser printers use pigments. Before printing, check if your sticker paper is printable on inkjet only or laser only or both. Part of the steps on how to print your own labels at home is knowing the appropriate paper for the specific printer you are using. However, some manufacturers apply a waterproof coating or finish over the paper media making it difficult to print on the surface using an inkjet or laser printer.

No matter what kind of personalized label you need, Avery has the perfect option. Finally, it’s time to cut out or separate the individual stickers from the sticker sheet. Some may have pre-divided sections to make this easier, but you’ll typically need to cut if you use laminate sheets. As a tip, it’s much easier to cut out simple designs with square or rectangular shapes. For home sticker makers who rely on their printer to create stickers, color stickers tend to be more expensive. That’s primarily due to the cost difference between black-and-white and color ink cartridges.
Summary: easy custom stickers at home
Labels also come in various shapes such as round, oval, square, and rectangle. Labels that come in various shapes are perfect for product branding or logo printing. Learning how to print your own labels requires the basic knowledge of the varieties of size, shape, coating, and adhesives available for purchase. In the pop-up window, create a file name and save it to either your free Avery account or to your computer. Use the sheet navigator on the right-hand side and choose Edit All to make changes to all your labels, such as changing the text style and size. Then, to apply a different design and/or text to individual labels, choose Edit One and click on the card you want to edit.
We recommend using Enko Products best-selling pre-sized labels suitable for specialized printers and regular printers. Some online shops have search options that allow you to key in specific label features such as label size, shape, coating and adhesive. This search option filters through hundreds of label types and results in a short list of available labels in the shop closest to what you want to purchase. The proper HP printer setting for sticker paper may vary depending on the texture of the surface, but “Labels” is usually the right option. Again, if you’re unsure, look into other user experiences.